PAC-DIARI manual
Your health diary, step by step.
From your first blood pressure reading to the PDF report for your appointment.
Before you start
PAC-DIARI brings together the PAC-SALUT Diary and PAC-NUTRI. The first time, it asks for your profile (year of birth, weight, height, activity and goal); you can change it in Settings → Profile and targets. With your height, the app calculates your BMI.
- Vital signs
- LibreView glucose
- Food
- Incidents
- Emotional diary
- Onco
- PDF reports
Each module has the PAC-SALUT navigation bar at the bottom: Records, Charts, Reports and Settings. The house icon goes back to the home screen and the ? icon opens help and this manual. Change the language in Settings → Language.
In this guide
1The home screen
Modules
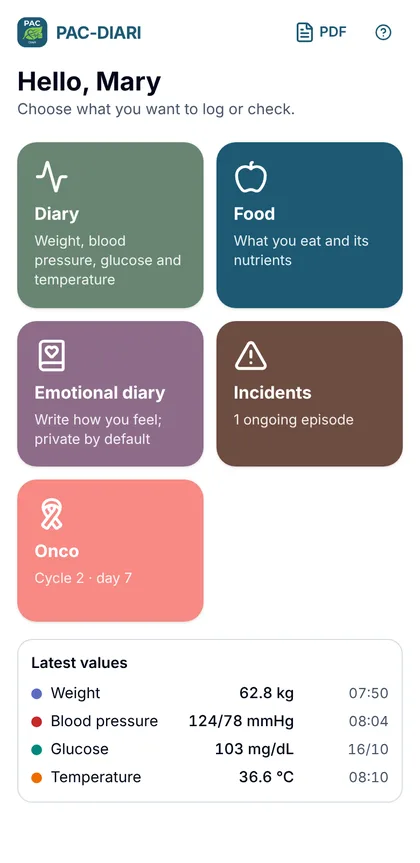
Each tile opens a module: Diary (vital signs), Food, Emotional diary, Incidents and Onco. Tiles show a summary: today’s meals, ongoing episodes, or the treatment cycle and day.
At the bottom you see the latest values of each vital sign. The PDF icon at the top opens the Follow-up report, which combines data from all modules.
Hiding modules
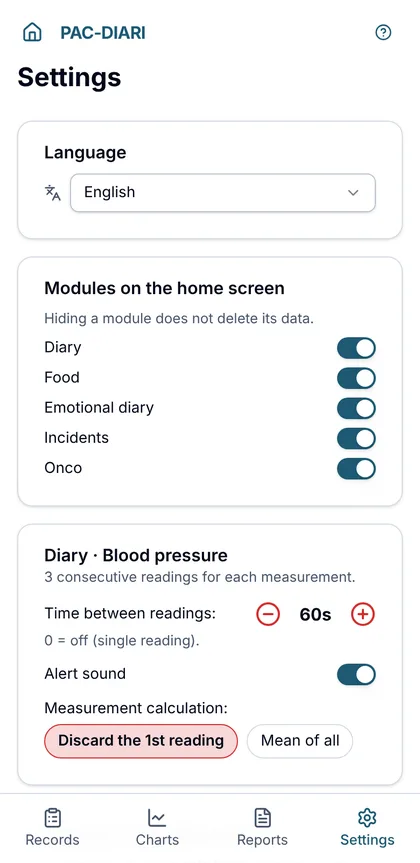
In Settings → Modules on the home screen you choose which modules are shown. Hiding one does not delete its data.
2Diary: vital signs
Logging a vital sign
Tap Weight, Blood pressure, Glucose or Temperature. The − and + buttons start from your last value, and the app warns you if a value is out of range.
Use the arrows at the top to change day. Each record can be edited (pencil) or deleted (bin).
For glucose you also choose the time (fasting, before or after a meal…).
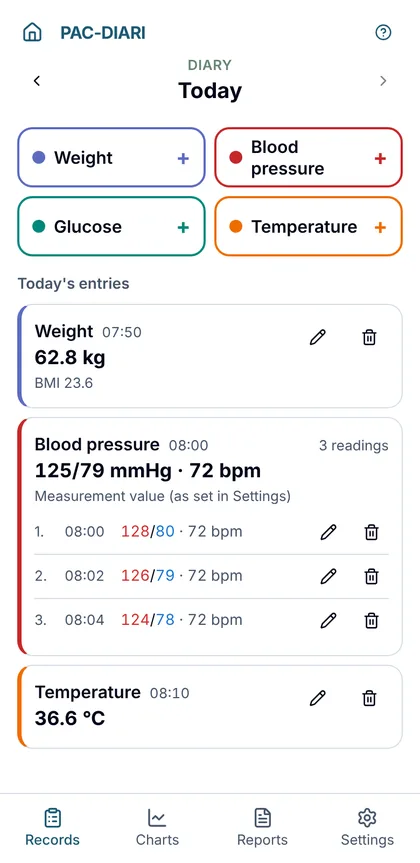
Blood pressure: three readings
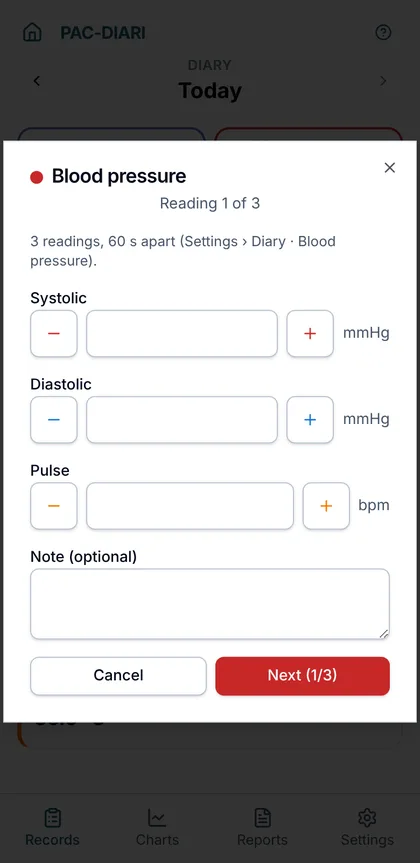
As in PAC-SALUT, each measurement is 3 readings with 60 s between them. Enter systolic, diastolic and pulse, tap Next, and the app counts down with a beep. Skip lets you not wait.
The measurement value discards the 1st reading and averages the rest. If you leave a measurement half-done, the app offers to continue it when you come back.
The time between readings, the sound and the calculation are set in Settings → Diary · Blood pressure.
3Sensor glucose (LibreView)
Importing the CSV
If you wear a FreeStyle Libre sensor, export your data from the LibreView website (CSV file) and, in Settings → Glucose · LibreView (CSV), tap Import CSV. Before importing you see the sensor, the period and the number of readings.
Automatic readings and scans are saved, but not your name or date of birth. If you import a file again, repeated readings are not duplicated.
The Diary shows the day’s average and the time in range 70–180 mg/dL, and the charts show the sensor curve.
The app does not read the sensor via NFC or Bluetooth: glucose is entered by hand or imported from LibreView.
4Food
The same as PAC-NUTRI
The Food module is PAC-NUTRI: food search in any language, barcode, label, dishes and recipes, favourites, fasting, charts and the nutrition diary.
You will find how it works in the PAC-NUTRI manual.
If you already used PAC-NUTRI, save a backup and restore it in PAC-DIARI (Settings → Your data → Restore).
5Incidents
Logging an incident
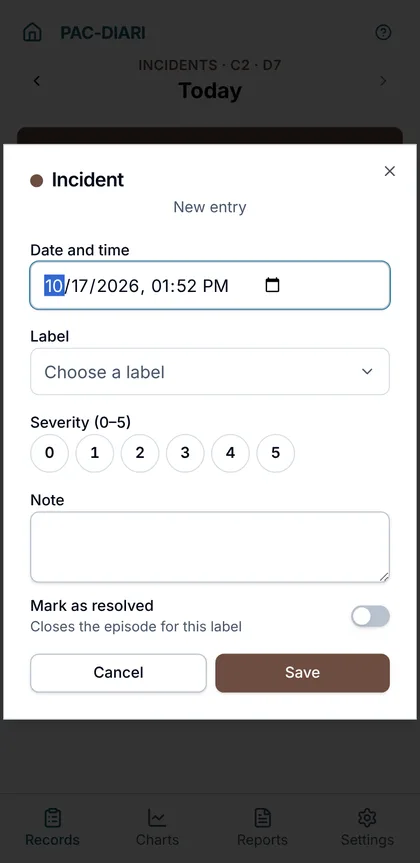
Tap New incident, choose the label (insomnia, tingling, headache…) or create your own, and rate the severity from 0 to 5.
Incidents with the same label are grouped into episodes. An episode closes when you tap Mark as resolved or after more than 3 days without any record.
Reports show, for each label, the number of episodes, the average duration and the maximum severity.
6Emotional diary
Writing
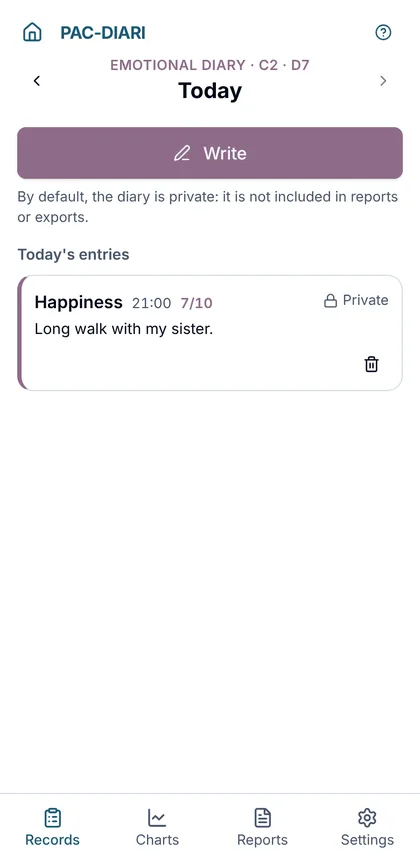
Tap Write, choose how you want to write (free, what I feel, what helped me), a label if you like, and the intensity from 0 to 10.
The diary is private by default: only the entries where you turn on Include in the report appear in reports.
7Onco: treatment follow-up
Setting up the treatment
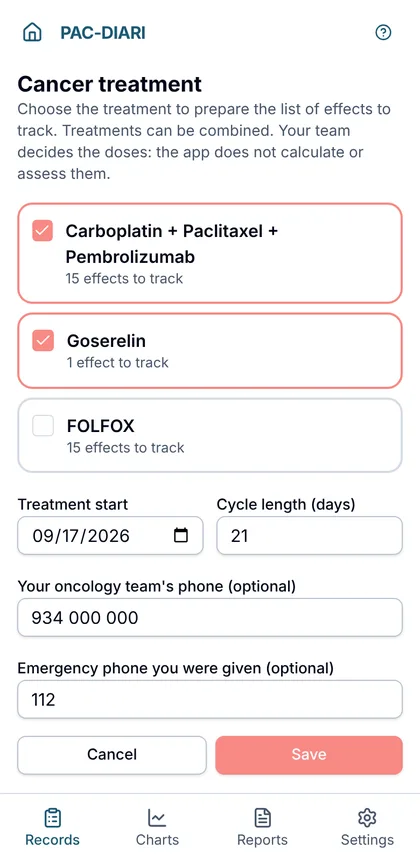
The first time you choose the treatment (they can be combined), the start date, the cycle length and, if you like, your oncology team’s phone and the emergency phone you were given. The treatment prepares the list of side effects to track.
Change it later with the icon at the top (Treatment and phone numbers).
Your team decides the doses: the app does not calculate or assess them.
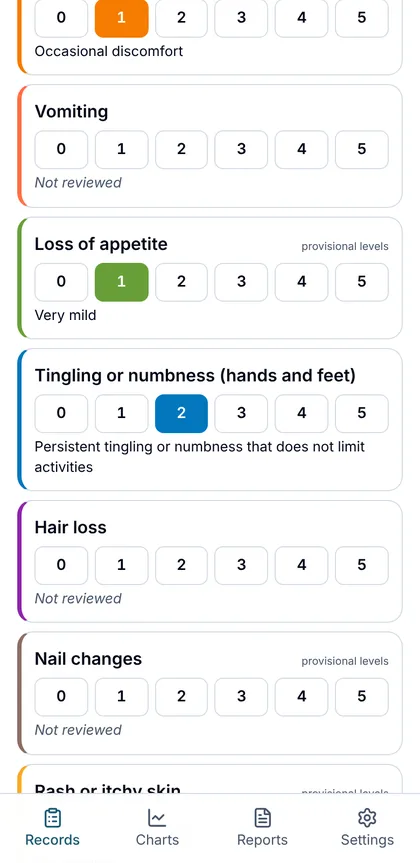
Today’s side effects
Each day you rate each effect from 0 to 5; under the numbers you see what each level means. If you don’t touch an effect, it stays not reviewed, which is not the same as 0 (no symptoms). Tapping the same number again clears it.
The rest, no symptoms sets all untouched effects to 0 at once. In Add or remove symptoms you add effects from the list or your own; removing one does not delete what you have already recorded.
Effects marked “provisional levels” have generic descriptions pending clinical review.
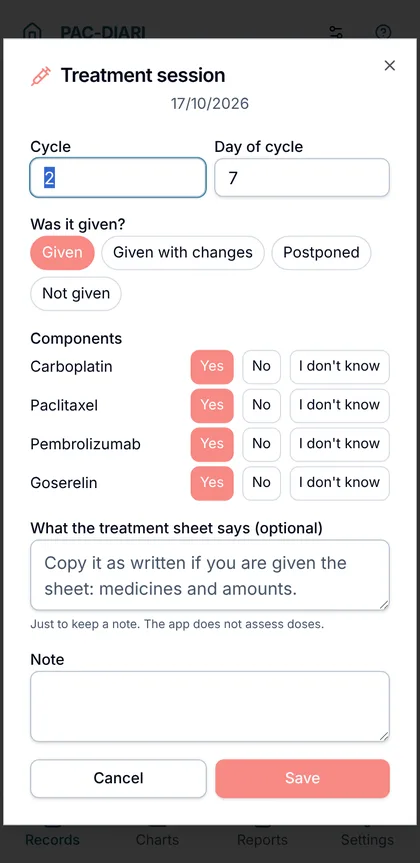
Treatment session
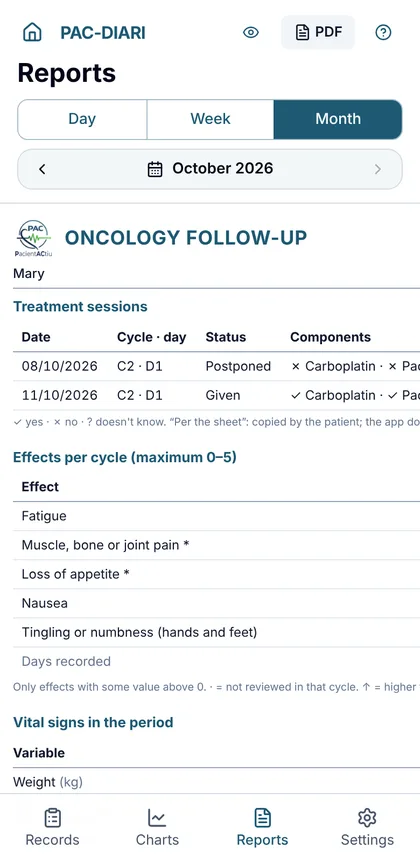
On the day you go to hospital, tap Treatment session. The app suggests the cycle and day. You say whether it was given, given with changes, postponed or not given and, if needed, the reason (blood test, fever or infection, side effects…).
For each medicine you tick Yes, No or I don’t know. If you are given the treatment sheet, you can copy what it says.
The cycle starts on the day 1 that is actually given: if day 1 is postponed, the cycle starts when it is finally given. The emotional diary and incidents show “Cycle N · day X”.
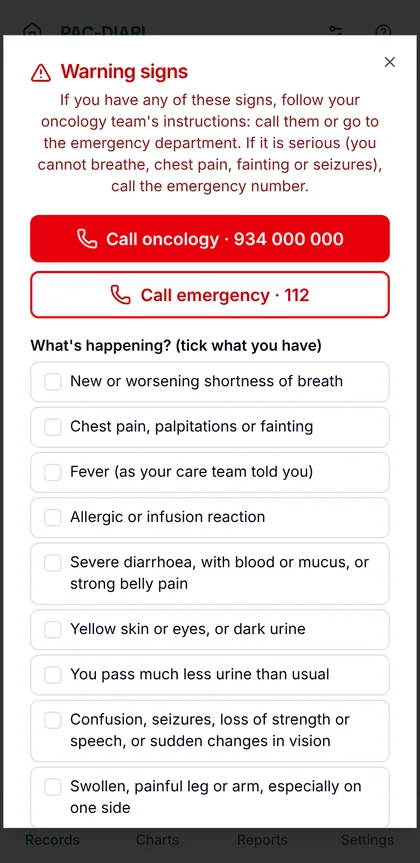
I feel worse · Warning signs
The red card shows the signs to watch for and buttons to call the numbers you saved. You can tick what is happening and what you did; it is recorded and appears in the report.
The app does not diagnose. If you have any of these signs, follow your team’s instructions; if it is serious, call the emergency number.
Charts and report per cycle
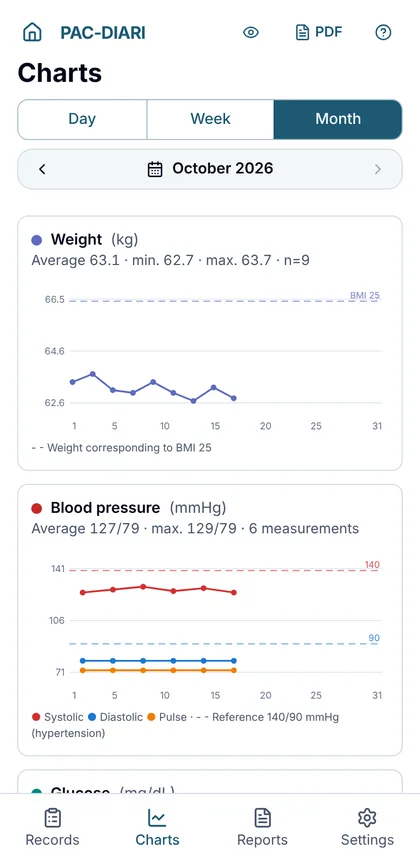
Charts show each effect from 0 to 5 with the sessions marked. Reports show the sessions, the maximum of each effect per cycle (↑ if higher than in the previous cycle), warning signs, vital signs and the emotional diary entries you chose to include.
8Charts and reports
Charts
Choose Day, Week or Month as in PAC-SALUT. Charts include reference lines (blood pressure 140/90, glucose 70 and 180, fever 38 °C, weight for BMI 25) and, below, the average, minimum and maximum.
Follow-up report
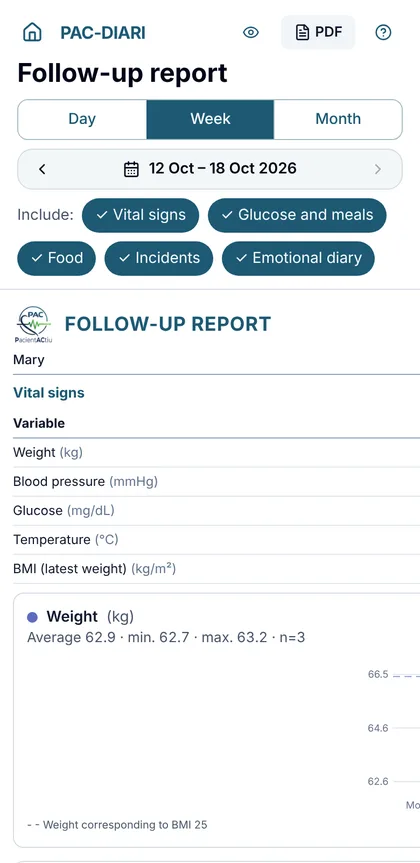
From the PDF icon on the home screen. Choose what to include (vital signs, glucose and meals, food, incidents, emotional diary) and the period.
PDF and preview
In Charts and Reports, the eye icon shows the PDF on screen before exporting, and the PDF icon creates it in landscape A4 and opens your phone’s Share menu.
Reports carry the PACientActiu logo and footer, as in PAC-SALUT.
9Your data
Backups
Everything is stored on your device. In Settings → Your data:
- Save backup: choose what goes in (everything or by parts: profile, food, vital signs, incidents, emotional diary, Onco) and where to save it (Drive, Dropbox, email…).
- Restore: recover a backup on this or another device (including one from PAC-NUTRI) and choose which parts. Merge adds them; Replace first deletes only the selected parts.
- Delete data…: delete everything or only the parts you select (for example, test data).
- Export log (CSV / Excel).
Make backups often and keep them off your phone. If you clear the browser data or uninstall the app, the data is lost.
Help
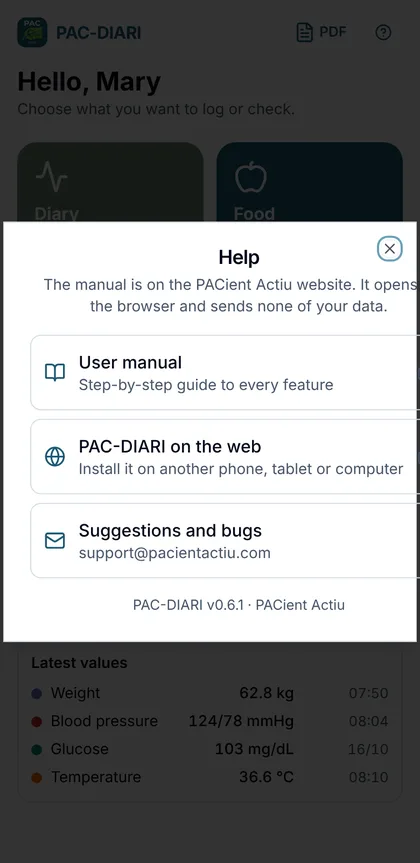
The ? icon opens this manual, the PAC-DIARI page (to install it on another device) and the suggestions email.